Primula Jekyll Introduction
Papp Jekyll Theme is a content focussed responsive theme for the Jekyll blogging platform. Designed with a focus on typography to provide a great experience for the reader. Purpose built to look great across all platforms and screen sizes.
Jekyll Theme Deployment
To run our the jekyll theme locally, navigate to the theme directory from your PC and run bundle install command in git client app. to install the dependencies, then run bundle exec jekyll serve to start the Jekyll server.
Here following some good resources to deploy jekyll :
- Manual Deployment
- Automated Deployment (Example: Travis CI, Circle CI, Buddy etc)
- 3rd Party Deployment (Example : Aerobatic, CloudCannon, Github Pages, Kickster, Netlify, Static Publisher)
How to add authors?
You need to follow 2 steps to add authors in that theme. Here following the steps :
Step 1 (Add author in post) :
In the post configuration area you need to put
For example :
there author name is Jhon Doe but i have to put 3 or 4 or 5 or any other number.
Step 2 (Add author in _author data folder) :
After adding the author_id in post you must need to create a html file with following configuration.
You can add more option there like, facebook, twitter, instagram, instagram, reddit with the social links. It will display in author information area. These are actually optional.
Now copy that html folder inside _authors data folder
If you have already created html file for that author then you may skip the step #2
Setup Navigation Menu
Navigation will be visible in the top header area. You can control and edit the navigation from the _data/navigation.yml data file. The current navigation links are:
You can add a title and a URL for each navigation item for the website. For example, if you want to add a link to the about page, you can append the following to the list.
Disqus Comment Settings
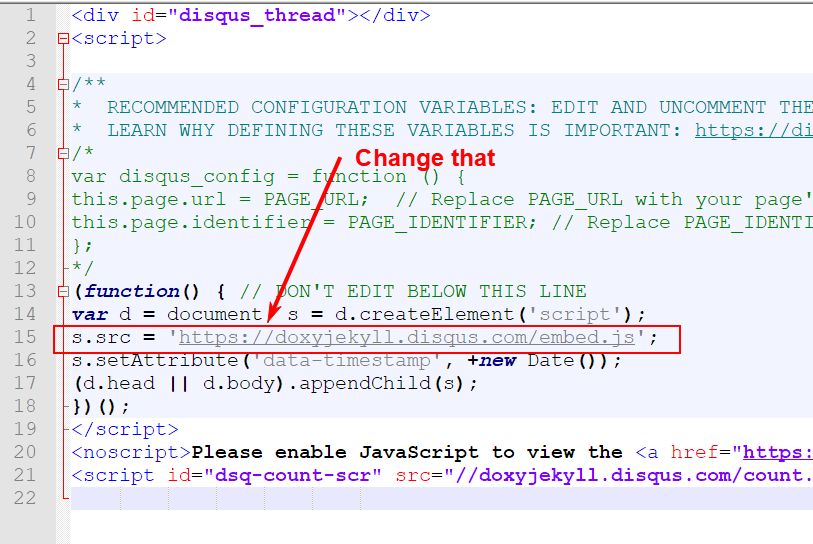
You need to change the shortname to use your own discuss comment system.
Open _includes/disqus_comment.html file, and change the _doxyjekyll _value on line number 15 with your Disqus account shortname.
s.src = ‘//doxyjekyll.disqus.com/embed.js’;
So, if your Disqus shortname is example, the final code above should be
s.src = ‘//example.disqus.com/embed.js’;

That’s all you need to setup Disqus from the theme side. If you get any issue feel free contact us.


